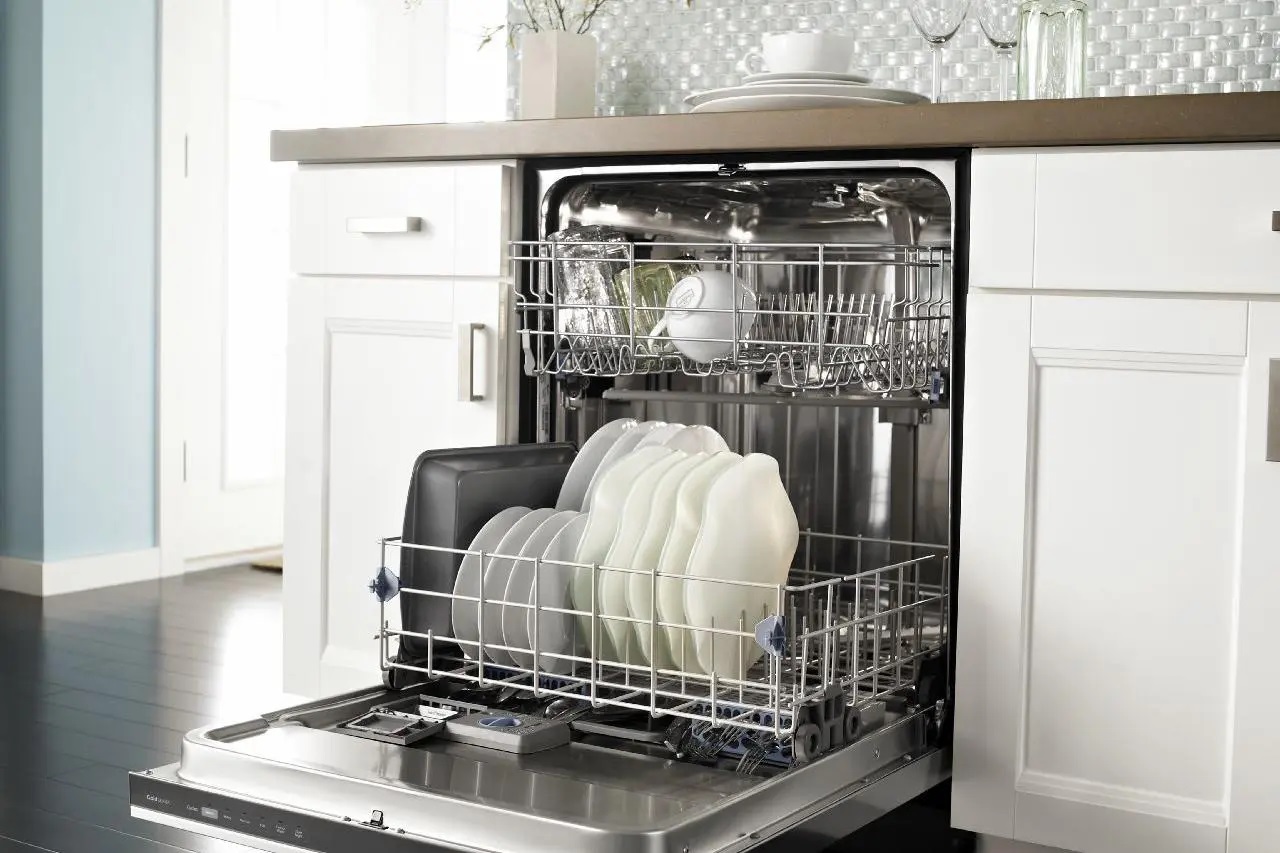
A dishwasher is an indispensable appliance in any modern kitchen, offering convenience and efficiency in cleaning dishes. However, encountering drainage problems can disrupt this convenience, leaving you with dirty dishes and a headache. If you own a Samsung dishwasher and find it not draining completely, there could be several reasons behind it. In this comprehensive guide, we’ll delve into the most common causes and provide expert advice on troubleshooting and resolving these issues effectively.
Recognizing Drainage Error Codes
To help you quickly identify if drainage is the culprit, Samsung dishwashers display specific error codes when something’s amiss. Be on the lookout for codes such as 5C, 5E, OE, or OC displayed on your dishwasher’s panel—these are all clear indicators of a drainage problem.
In addition to codes, you might also notice certain indicator lights flashing in combination, like the Heavy and Auto buttons, or Heavy and Quick lights blinking together. These visual signals are designed to alert you to drainage issues, so it’s wise to consult your user manual for the exact combinations that apply to your particular model.
Determining the Source of the Drainage Problem
Before blaming your Samsung dishwasher for the standing water, it’s wise to rule out other potential culprits in your kitchen’s plumbing.
Start by running water directly into the sink that your dishwasher drains into. If the sink backs up or drains slowly, a clog in your home’s plumbing—not the dishwasher—may be to blame.
For kitchens equipped with a garbage disposal, double-check that it’s functioning smoothly and is free from blockages. If your dishwasher has been recently installed (or if you just upgraded your disposal), ensure the small knockout plug inside the disposal’s drain inlet has actually been removed—a surprisingly common oversight that will stop water flow in its tracks.
By verifying that the sink and garbage disposal are draining freely, you can more confidently focus your troubleshooting efforts on the dishwasher itself if issues persist.
Safety First: Why Disconnect Power and Water?
Before you roll up your sleeves and dive into troubleshooting your dishwasher, it’s crucial to put safety at the top of your checklist. Unplugging the appliance and shutting off the water supply are essential steps—think of them as your kitchen’s version of a seatbelt.
By disconnecting the power, you eliminate the risk of electric shock, which can happen if you accidentally touch a wire or component while inspecting inside the machine. Turning off the water prevents unexpected leaks and flooding that could cause a slippery mess—or worse, lead to water damage in your kitchen.
Taking a minute to secure these basics will give you peace of mind and ensure your repair process is as smooth (and safe) as freshly washed glassware.
1. Clogged Drain Hose
One of the primary reasons for a Samsung dishwasher not draining fully is a clogged drain hose. Over time, food particles, grease, and debris can accumulate in the hose, obstructing the flow of water. Inspect the drain hose for any blockages and clean it thoroughly to restore proper drainage.
To do this, first check the hose behind the dishwasher to ensure it’s not kinked or crushed, as improper installation can easily pinch the hose and stop water from flowing out. If everything looks fine but the problem persists, you may need to disconnect the drain hose from underneath the sink and check for hidden clogs.
Place the end of the hose in a large bucket and run a short wash cycle to see if water flows freely or if a blockage becomes dislodged. Be ready to turn off the dishwasher or swap in another bucket quickly to catch any water that rushes out. Sometimes, you may need to remove the bottom front kick plate or access panel to reach where the drain hose connects to the pump—removing and cleaning this section can often solve persistent drainage issues.
How to Test for a Blocked Drain Hose or Faulty Pump
Another common culprit behind drainage woes is a blocked or kinked drain hose—or an underperforming pump. Here’s how you can determine which is to blame:
- Inspect the Hose Placement: Start by examining the drain hose behind your dishwasher. Is it crimped or bent at a sharp angle? Kinks can restrict water flow, much like a pinched straw makes it tough to drink your favorite smoothie.
- Clear Out Gunk: Disconnect the hose from under the sink and check inside for any sneaky blockages—think food scraps and built-up grease. If you spot any debris, clear it out thoroughly.
- Test the Drainage: Once the hose is free, place its end into a large bucket. Run a short dishwasher cycle; if water shoots out energetically, your hose is likely clear, and your pump is doing its job. If not much water emerges, or none at all, your pump might be struggling.
- Pump Access: For a closer look, you may need to remove the bottom access panel of your dishwasher to reach the pump connection. Carefully detach and inspect for blockages here as well.
By following these steps, you’ll be better equipped to pinpoint whether a blocked hose or a faulty pump is preventing your dishwasher from draining properly.
Accessing the Drain Hose Connection
To inspect or clean the drain hose where it attaches to the pump, you’ll first need to remove your dishwasher’s lower access panel, sometimes called the kick plate. This panel is typically located at the bottom front of the appliance and can be taken off by loosening a few screws.
Once the panel is off, you’ll have a clear view underneath the dishwasher, making it much easier to reach and examine the hose connection to the pump. Carefully disconnect the hose to check for clogs or buildup, and clean as needed before reassembling everything securely.
Effective Cleaning Solutions for Dishwasher Blockages
If you suspect buildup is contributing to the drainage problem, there are simple yet effective cleaning methods that can help clear obstructions from your dishwasher’s system. Start by using a dishwasher cleaning product designed to target food particles and mineral deposits—these are widely available from trusted brands like Affresh or Finish. Follow the manufacturer’s instructions for safe and optimal use.
Prefer a household remedy? White vinegar is a reliable alternative. Pour 1–2 cups of vinegar into a dishwasher-safe bowl and place it securely on the top rack. Run a normal wash cycle without any dishes inside. The vinegar will work to loosen debris and mineral scale, helping restore proper water flow. This routine maintenance step can go a long way toward preventing stubborn blockages and keeping your dishwasher running smoothly.
2. Blocked Air Gap or Garbage Disposal
The air gap or garbage disposal connected to your dishwasher’s drain line can also become blocked, preventing proper drainage. Check these components for any obstructions and clear them if necessary. Ensuring a clear path for water to flow will help resolve drainage issues.
In most dishwashers, the drain hose must be attached to either an air gap or configured with a high loop. These setups prevent dirty wastewater from flowing back into your clean dishes. The air gap—a small fitting often mounted next to the sink faucet—introduces air into the hose, breaking any potential siphon and stopping backflow. Alternatively, the high loop method involves securing the drain hose so it arches up and is held just beneath the sink countertop, achieving a similar effect.
If the air gap is blocked or the drain hose isn’t properly looped, your dishwasher may struggle to drain. To check the air gap, simply remove its cover and cap, then clear away any visible debris. Regular inspection and cleaning of these components can help keep your dishwasher draining properly.
How Air Gaps and High Loops Prevent Drainage Problems
Another crucial factor in preventing drainage issues is ensuring your drain hose is properly set up with an air gap or a high loop.
Both of these features act as safeguards against backflow—meaning they keep dirty water from flowing back into your clean dishwasher. The air gap, usually a small fitting installed on your kitchen sink or countertop, introduces air into the line and breaks any potential siphon. This stops wastewater from being drawn back into the dishwasher after a drain cycle.
Alternatively, the high loop method involves securing the drain hose in an arch underneath your sink, well above the water level in your sink or disposal. By making the hose rise before it goes down to the drain, gravity helps prevent used water from slipping back into the appliance. Ensuring either method is in place is a simple but vital step in keeping your dishwasher draining smoothly and your dishes spotless.
5. Inspecting and Cleaning the Check Valve
Another possible culprit behind drainage issues is a faulty check valve. The check valve’s main job is to prevent wastewater from flowing back into your dishwasher once it’s been pumped out. If this valve becomes stuck, clogged, or worn, it can lead to improper drainage and standing water at the bottom of your appliance.
To inspect the check valve, start by unplugging the dishwasher for safety. You’ll find the check valve near the drain pump, often accessed by removing the lower access panel or kickplate at the base of the unit. Once you’ve located it:
- Look for any food debris, buildup, or foreign objects preventing the valve (or flapper) from moving smoothly.
- Gently clean the area using a soft brush and warm, soapy water.
- Ensure the flapper or valve isn’t jammed, cracked, or showing signs of damage.
If cleaning doesn’t resolve the issue and the valve still appears worn or doesn’t open and close freely, replacement may be necessary. Most hardware stores or appliance repair shops carry compatible check valves for major brands. Replacing this small component can often restore your dishwasher’s ability to drain efficiently.
3. Faulty Drain Pump
A malfunctioning drain pump can hinder the dishwasher’s ability to drain water effectively. If the pump is defective or worn out, it may not create enough suction to expel water from the appliance.
How to Check if the Drain Pump Is Faulty
If basic troubleshooting hasn’t solved your Samsung dishwasher’s drainage woes, it’s time to inspect the drain pump more closely. A drain pump that isn’t working can’t move water out of the appliance as it should. Here’s how you can determine if your drain pump is the culprit:
- Listen and Inspect: When the drain cycle starts, listen for any unusual humming or grinding noises—these can signal a problem. Carefully examine the pump for visible signs of damage, especially the impeller (the small fan-like part that moves water). A broken or jammed impeller will hinder drainage and needs replacement.
- Try Rotating the Impeller: Gently attempt to spin the impeller by hand. If it feels stuck or doesn’t spin easily, debris may be jammed inside, or the pump itself could be defective.
- Test With a Multimeter: To check for electrical failure, disconnect the dishwasher from power and use a multimeter to measure the pump’s resistance. Most functioning drain pumps will show a reading close to 200 ohms. If the reading is off, or the circuit is open, it’s time for a new pump.
- Accessing the Pump: Depending on your Samsung model, you will either remove the bottom front kick plate or tilt the dishwasher back to unscrew the panel underneath. Always refer to your user manual for model-specific instructions, and double-check the power is off before starting.
If you discover damage or a failed electrical test, replacing the drain pump is often the best way to restore smooth, efficient draining.
Signs of a Faulty Drain Pump
A drain pump can fail in two main ways—mechanically or electrically. Knowing the symptoms of each can help you zero in on the culprit behind your dishwasher’s drainage woes.
Mechanical failure usually involves the impeller, a small but mighty component responsible for moving water out of the machine. If the impeller is broken, jammed, or difficult to rotate by hand, it’s often an indicator that the pump is not operating as it should. Sometimes, debris or foreign objects can get lodged in or around the impeller, so it’s wise to inspect and clear away any blockages.
Electrical failure, on the other hand, typically involves the pump motor itself. To check for this type of issue, use a multimeter to test the pump for electrical continuity. A healthy pump generally shows resistance—often around 200 ohms. If the reading is far off or there’s no continuity, the pump isn’t functioning properly and likely needs replacement.
In either scenario, addressing a faulty pump is crucial for restoring your Samsung dishwasher’s draining performance. In such cases, replacing the drain pump is often necessary to restore proper drainage.
Accessing and Replacing the Drain Pump
To access the drain pump for inspection or replacement, you’ll need to locate it—usually at the bottom of your dishwasher. For most models, there are two common approaches:
- Front Access: If your dishwasher has a removable kick plate (the panel at the bottom front), start by unplugging the appliance, then remove the screws holding the plate in place. Once removed, you should have a clear view of the pump and related components.
- Bottom Access: Alternatively, for some models, it helps to carefully tip the dishwasher onto its back. Locate and unscrew the access panel underneath. This method exposes the pump assembly, making it easier to inspect or swap out the part if needed.
Remember to disconnect the dishwasher from power and water sources before beginning any repairs. Take note of how hoses and wires are connected to the pump, so you can reattach them correctly during reassembly. If you’re unsure, snapping a quick picture before removal can save time and headaches later.
How to Test a Dishwasher Drain Pump for Electrical Continuity
If you’ve ruled out obvious blockages and your dishwasher still refuses to drain, it’s time to test the drain pump itself. Electrical faults within the pump can sometimes be the culprit, leading to ineffective drainage even when everything else seems clear.
To check if the drain pump is working electrically, you’ll need a multimeter:
- Unplug Your Dishwasher: Safety first. Always disconnect the appliance from power before attempting any checks or repairs.
- Access the Drain Pump: Depending on your Samsung model, you may need to remove the lower front panel to reach the pump.
- Disconnect the Pump Wires: Carefully detach the wire connectors from the pump terminals.
- Set Your Multimeter: Switch the multimeter to the resistance (ohms) setting.
- Test for Continuity: Place the probes on the drain pump terminals. A healthy pump motor will typically give you a reading in the neighborhood of 200 ohms—but check your model’s specs for specifics.
- Interpret the Results: If the multimeter shows infinite resistance (an open circuit), the pump has failed and needs to be replaced. If the reading matches the expected resistance range, the pump has continuity, and your issue likely lies elsewhere.
This simple test can help you zero in on whether the drain pump is at fault or if you need to investigate other potential trouble spots.
4. Solenoid Valve Location
The solenoid valve, which plays a crucial role in the dishwasher’s draining mechanism, is typically found near the motor or attached to the drain pump assembly. To locate it, you’ll generally need to remove the dishwasher’s lower front panel or access kick plate. Once inside, look around the base of the dishwasher—you should see the solenoid mounted close to the pump. If you suspect a faulty solenoid, ensure the appliance is unplugged before inspecting or replacing it to avoid any electrical hazards.
4. Malfunctioning Drain Solenoid Valve
Another possible culprit for drainage issues is a faulty drain solenoid valve, which controls the flow of water out of your Samsung dishwasher during the drain cycle. If this valve fails to open when needed, water will remain inside the dishwasher.
To determine if the solenoid valve is working correctly:
- Start by disconnecting power to the dishwasher for safety.
- Access the solenoid valve, usually located near the drain pump or motor. You’ll often find it by removing the lower front kick plate or access panel.
- Inspect the valve for obvious physical damage or corrosion.
- Use a multimeter to check for electrical continuity. If there’s no continuity, the solenoid is likely defective and should be replaced.
A working drain solenoid ensures water can exit the appliance as intended, so replacing it when defective is crucial for resolving stubborn drainage problems.
4. Drain Impeller Damage
The drain impeller is responsible for pushing water out of the dishwasher during the drain cycle. If the impeller is damaged or worn, it may not function correctly, leading to drainage problems. Inspect the impeller for any signs of damage and replace it if necessary to improve drainage performance.
5. Check Valve Issues
The check valve, sometimes referred to as the “flapper,” serves as a gatekeeper in your dishwasher’s drainage system. Its main job is to ensure water flows out of the dishwasher during the drain cycle, while preventing any used water from flowing back in. If the check valve gets stuck or damaged, wastewater can remain trapped or even re-enter the dishwasher, sabotaging your cleaning efforts.
To address this, locate the check valve—usually near the drain pump outlet. Remove the bottom access panel or kick plate to access it. Make sure the flapper moves freely and inspect for any noticeable wear or buildup. If cleaning doesn’t resolve the problem and the flapper seems worn out, replacing the check valve is the best solution for restoring proper drainage.
5. Check Valve Location and Maintenance
Another potential culprit for drainage woes is a faulty check valve. The check valve keeps wastewater from flowing back into the dishwasher once it’s been pumped out—think of it as a one-way door for used water.
Typically, you’ll find the check valve situated on the outlet port of the drain pump or nestled within the pump housing. To access it, you’ll usually need to remove the lower front panel (sometimes called the kick plate) of your Samsung dishwasher. Once exposed, examine the small flapper inside; it should move freely without resistance. If it’s stuck, gently clean away any buildup. However, if the flapper appears worn or damaged, replacing the check valve will help restore the smooth flow of water and keep dirty water from making an unwanted encore.
5. Faulty Drain Solenoid
Some Samsung dishwasher models include a drain solenoid valve, which opens to let water exit the appliance during the drain cycle. If this part malfunctions, the valve won’t open, and your dishwasher won’t drain as it should.
To determine if the solenoid is the culprit, you’ll need to test it for continuity. Here’s how:
- First, ensure the dishwasher is unplugged to avoid any risk of electrical shock.
- Locate the drain solenoid. It’s typically found near the drain pump or motor and is accessible by removing the bottom front kick plate or access panel.
- Once you’ve found it, disconnect the wires attached to the solenoid terminals.
- Using a multimeter set to measure continuity, touch the meter’s probes to the solenoid’s terminals.
- If the meter indicates no continuity, the solenoid is defective and should be replaced.
Replacing a faulty solenoid is usually straightforward—just swap out the old one for a new part that matches your dishwasher’s model. This can restore proper drainage function and get your appliance back in top shape.
5. Clogged Filter or Drain Basket
Samsung dishwashers are equipped with filters and drain baskets to trap debris and prevent it from entering the drain pump or hoses. If these components become clogged with food particles or debris, it can impede drainage. Regularly clean the filter and drain basket to ensure proper water flow and prevent drainage issues.
6. Incorrect Installation or Leveling
Improper installation or leveling of the dishwasher can also contribute to drainage problems. If the appliance is not installed correctly or is not leveled properly, it can affect the flow of water and lead to drainage issues. Ensure that your Samsung dishwasher is installed according to the manufacturer’s guidelines and is leveled correctly to prevent drainage problems.
7. Overloaded Dishwasher
Overloading the dishwasher with dishes can overwhelm the drainage system, resulting in incomplete draining. Avoid overloading the appliance and ensure that dishes are arranged properly to allow adequate water flow during the wash and drain cycles.
8. Drain Hose Height
The height of the drain hose plays a crucial role in ensuring proper drainage in a dishwasher. If the drain hose is installed incorrectly or positioned too high, it can impede the flow of water and cause drainage issues. Verify that the drain hose is positioned according to the manufacturer’s recommendations to optimize drainage performance.
Conclusion
Dealing with a Samsung dishwasher that doesn’t drain completely can be frustrating, but identifying the underlying causes can help you resolve the issue effectively. By following the troubleshooting tips outlined in this guide, you can diagnose the problem and take appropriate steps to restore proper drainage. However, if you encounter persistent drainage issues or require professional assistance, don’t hesitate to contact Dial Appliance Service. With our expertise in dishwasher repair and a commitment to customer satisfaction, we’ll ensure that your Samsung dishwasher is back to optimal performance in no time.
If you are having issues with your Samsung dishwasher not draining completely, feel free to contact Dial Appliance Service today for expert assistance!
About Dial Appliance Service
Dial Appliance Service is a leading appliance repair company serving Brooklyn, NY, and the surrounding areas. Specializing in dishwasher repair, oven repair, refrigerator repair, stove repair, washing machine repair, and dryer repair, we offer prompt and reliable service for all major appliance brands. With factory warranty service available, you can trust us to deliver exceptional repairs and customer satisfaction every time. Contact us today for all your appliance repair needs!
Dial Appliance of Brooklyn, NY is the trusted local repair company for Samsung Dishwashers. Schedule Your Dishwasher Repair Service Now at (718) 368-1512 or Contact Us Now!